Load Balancer File Path Settings
When configuring TDS behind a load balancer it is often necessary to point the File Path Settings to a shared network folder (which all the replicated TDS servers would point to). In this scenario, there are various methods for sharing a network drive with an IIS application/process. Below are the two most common methods.
One option is to change the TDS application pool to run under an Active Directory account which can then be set to have read and write privileges to the shared drive. The following steps will guide you through changing the TDS application pool identity to run under an AD account.
- Create or chose an AD service account to run TDS under.
- Share the desired network drive with the chosen AD service account.
- Open IIS Manager on one of the replicated TDS application servers.
Note: The following process will need repeated on each TDS application server.
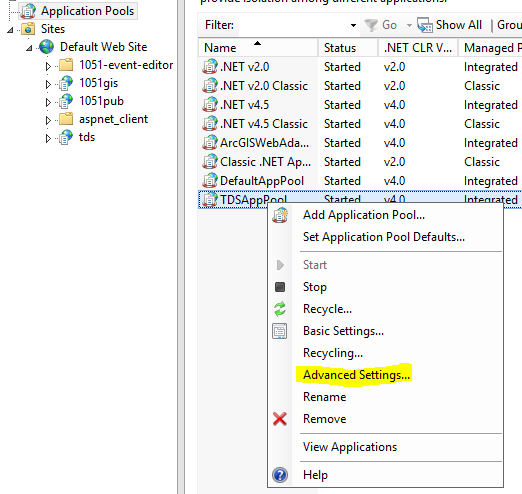
- Navigate to the Application Pools list, under the appropriate site.
- Right click on TDSAppPool.
- Click Advanced Settings.

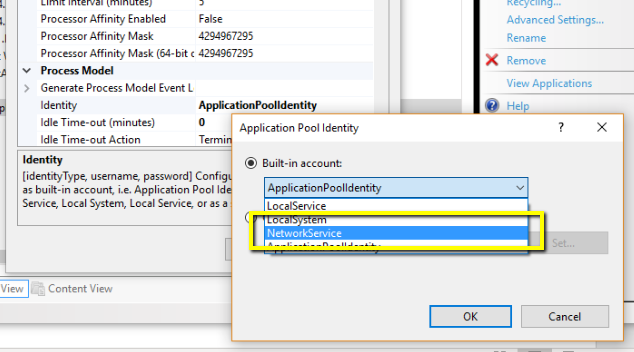
- Select the options button in the Identity row.

- Select Custom account.
- Click the Set… button.
- Enter the AD service account (prefixed with the domain) and password.
Example: DOMAIN\admin.service
- Click OK.
- Load the URL to the specific TDS application (not the URL through the proxy).
- We want to test that the configuration is working for this specific instance.
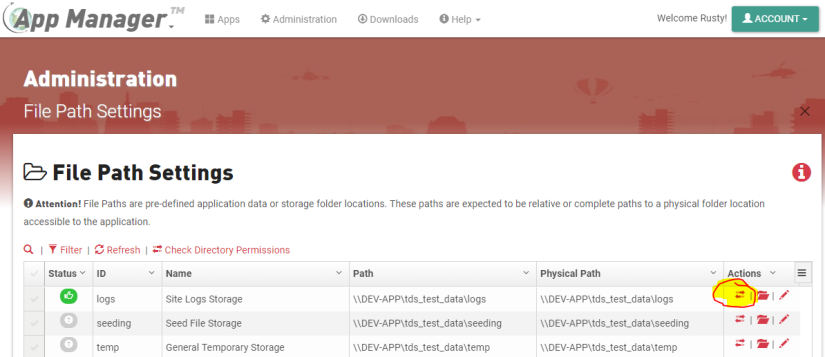
- Go to Administration > File Path Settings.
- Modify each of the file path’s to point to the shared folder.
Example: \\YOUR_SHARED_SERVER\YOUR_SHARED_FOLDER\logs.
- Click the test icon to verify that TDS has proper permissions to the shared folder.

- If the shared folder is accessible and has read/write privileges the status will become green.
- If the shared folder does not have the necessary privileges (status of red), verify the following:
- Ensure that the folder is shared with Read and Write privileges with the AD service account.
- Ensure that the TDS Application pool is set to use the AD service account (has the domain filled in and has proper password entered).
- Ensure that you are running the proper TDS instance (should be directly running the specific replicated TDS server that you changed the app pool identity for).
An alternative option is to change the TDS application pool to run under “Network” instead of an AD service account (as described in Option 1). In this case, access to the network will use the domain account for the server.
The following steps can be used in conjunction with the Option 1 steps:
- Follow Option 1 instructions but select NetworkService rather than Custom account when selecting the app pool identity.

- Set the shared driver permissions to grant Read/Write access to the server’s domain account.
Example: DOMAIN\YOUR_SERVER_NAME.
Note: This option has not been confirmed or tested. This configuration option is based off Microsoft’s documentation. Read more about this option’s configuration here.
